Setting Up ConvertKit for Email Subscriptions in Your Next.js Blog
A step-by-step guide to integrating ConvertKit with your Next.js blog to grow your email subscriber list
Setting Up ConvertKit for Email Subscriptions in Your Next.js Blog
Email newsletters are one of the most effective ways to connect with your audience and build a loyal following. In this guide, I'll walk you through the process of setting up ConvertKit with your Next.js blog to collect email subscriptions.
Why ConvertKit?
ConvertKit is a powerful email marketing platform designed specifically for creators and bloggers. It offers:
- Simple but powerful subscriber management
- Easy-to-create forms and landing pages
- Tag-based subscriber organization
- Automation capabilities (sequences and rules)
- Excellent deliverability rates
Best of all, ConvertKit offers a free plan for up to 1,000 subscribers, making it perfect for new bloggers.
Step 1: Create a ConvertKit Account
If you don't already have one, sign up for a ConvertKit account. You can start with their free plan, which includes all the essential features we need.
Step 2: Create a Form in ConvertKit
Once you've created your account and logged in, you'll need to create a form to collect email addresses: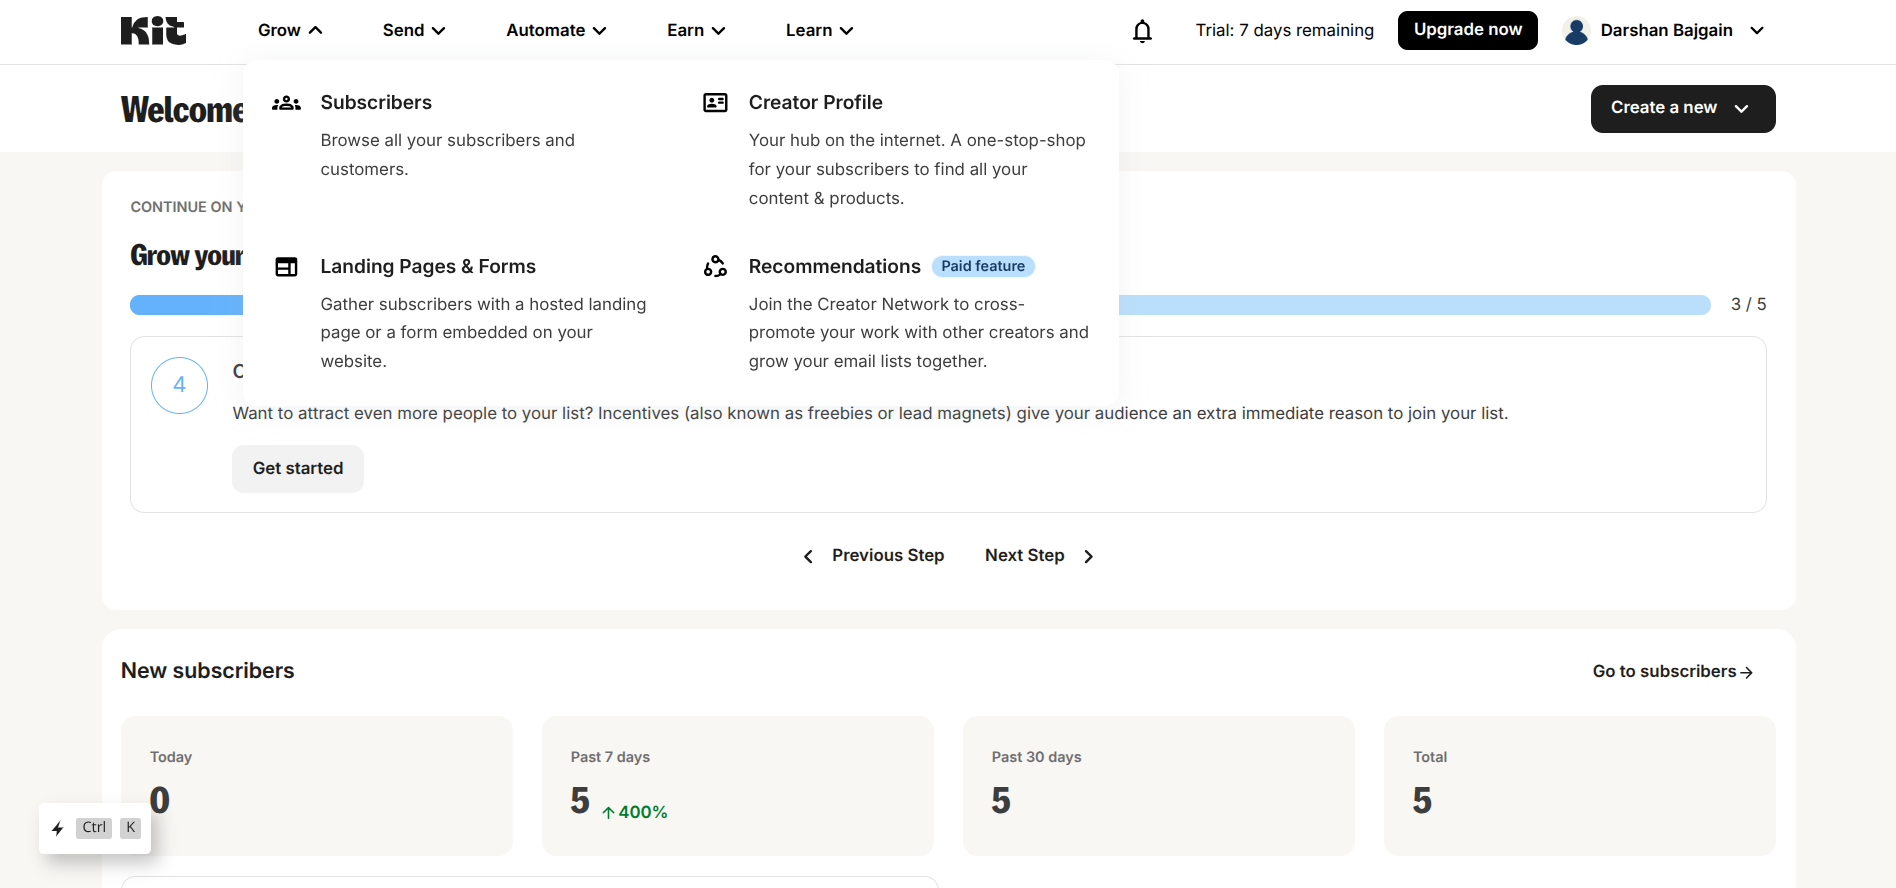
- Click on the "Grow" tab in the main navigation
- Click "Landing Pages and Forms"
- Click "Create a form"
- Select a template and customize it to match your blog's design
- Save your form
After creating your form, you'll need to note down the Form ID. You can find this in the URL when you're editing your form. For example, if the URL is https://app.convertkit.com/forms/designers/your_form_id/edit, your Form ID cqan be like this 7485152.
Step 3: Create a Tag for Your Subscribers
Tags help you organize your subscribers based on their interests or how they joined your list:
- Click on the "Subscribers" tab in the main navigation
- Look for the "Tags" section on the right side (just below the "Add Subscriber" button)
- Click "Create a tag"
- Name your tag (e.g., "Blog Subscribers")
- Save the tag
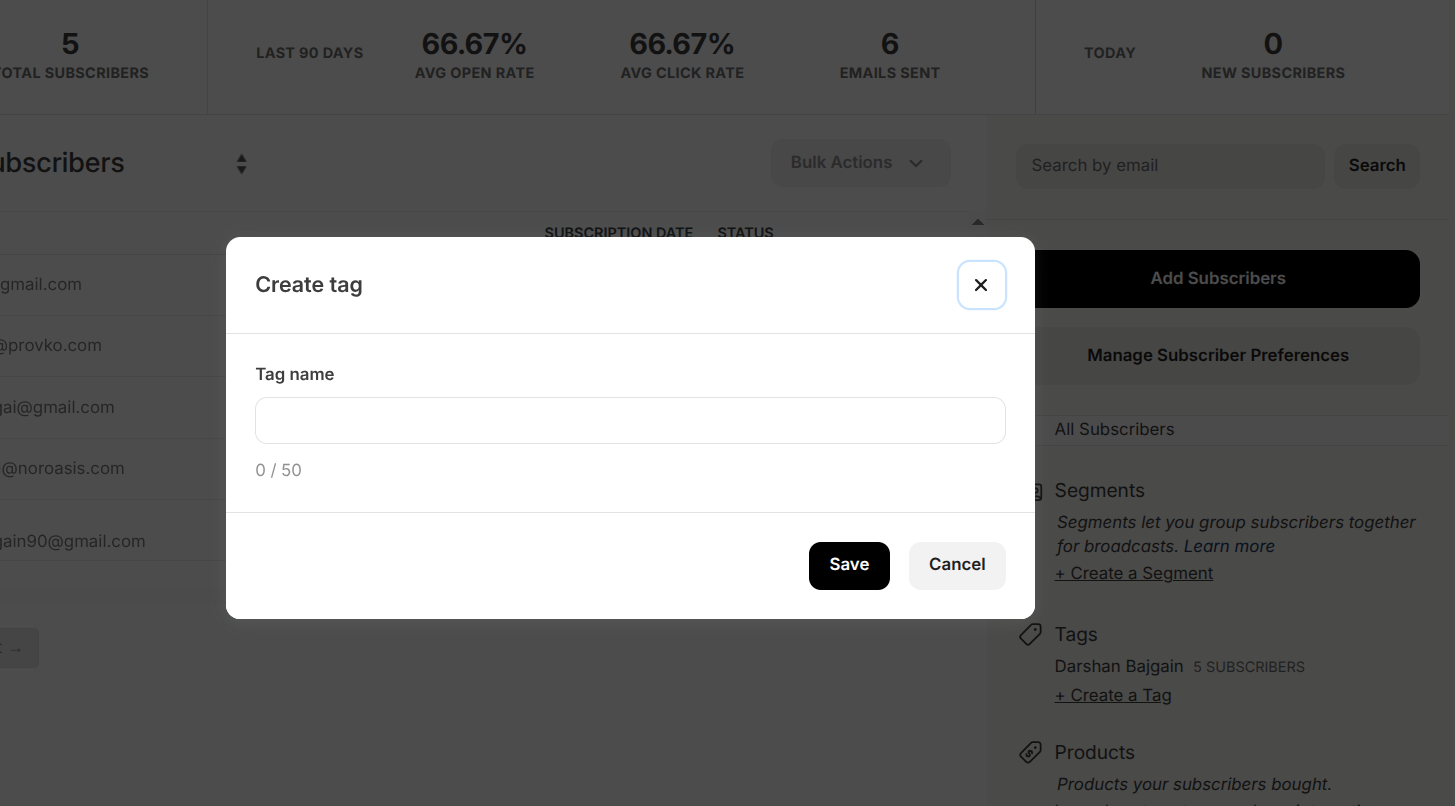
After creating your tag, click on it to view subscribers with that tag. The Tag ID will be in the URL. For example, if the URL is https://app.convertkit.com/subscribers?subscribable_ids=${your_tag_id}&subscribable_type=tag, your Tag ID can be like this 7353793.
Step 4: Get Your API Key
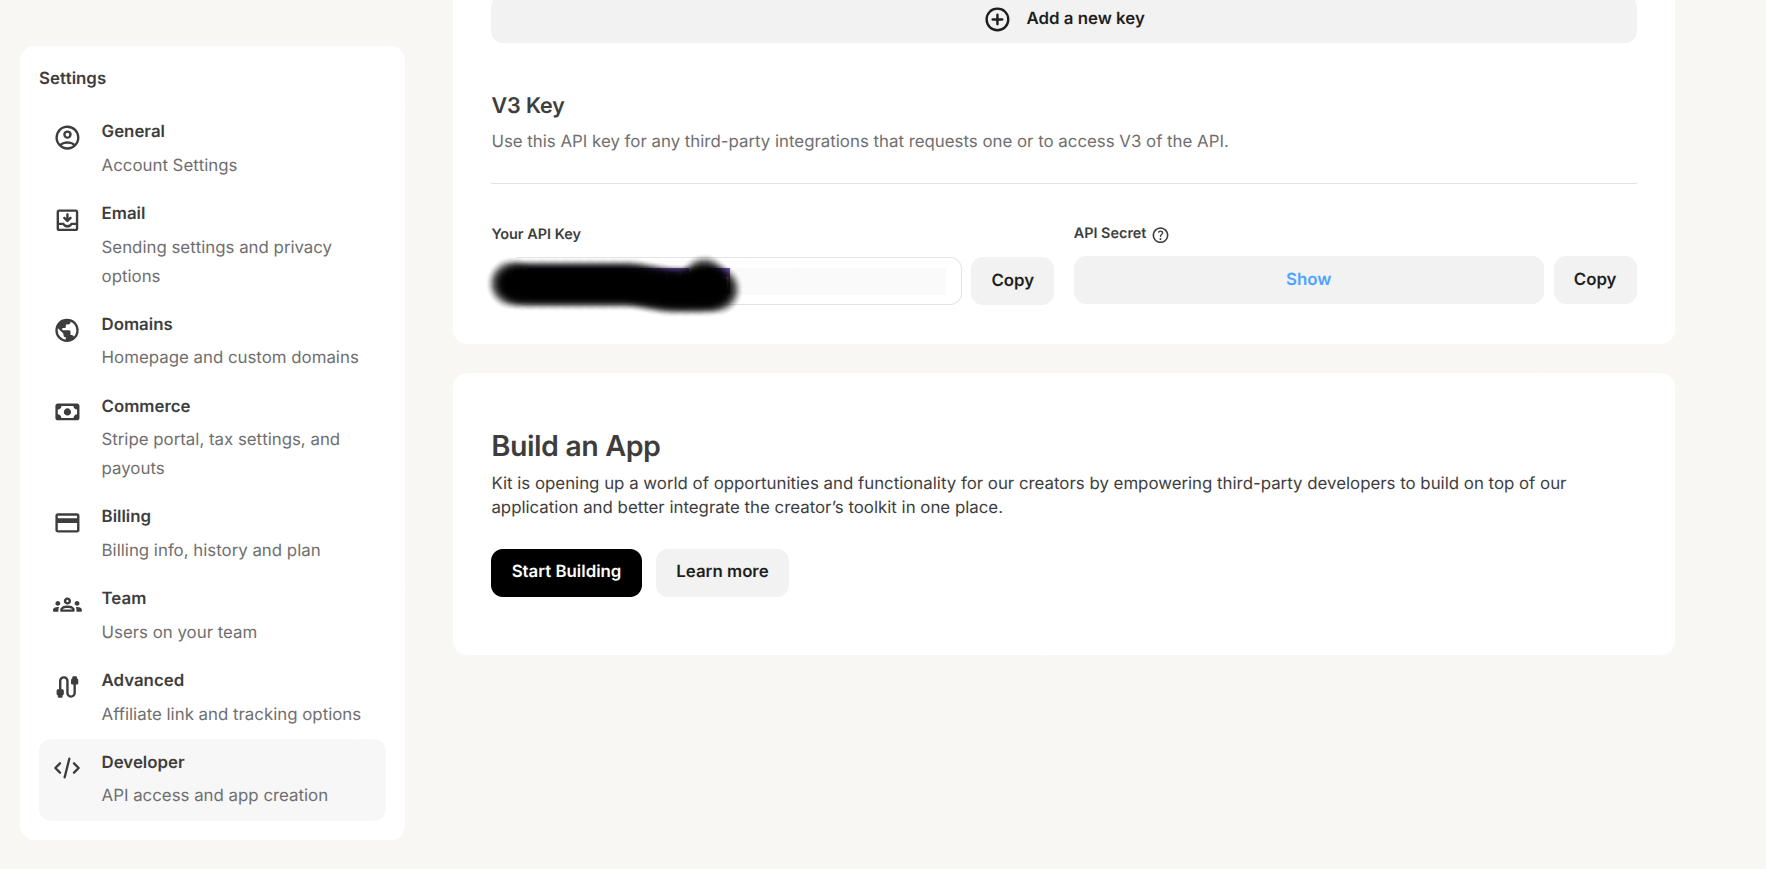
To connect your Next.js blog with ConvertKit, you'll need an API key:
- Click on your profile icon in the top-right corner
- Select "Settings"
- Go to the "Developer" tab
- Copy your API Key (or create one if you don't have one yet)
Step 5: Set Up Environment Variables
Create or update your .env.local file in your Next.js project with the following variables:
CONVERTKIT_FORM_ID=your_form_id
CONVERTKIT_API_KEY=your_api_key
CONVERTKIT_TAG_ID=your_tag_id
Replace the placeholder values with your actual Form ID, API Key, and Tag ID.
Step 6: Create the API Endpoint
Now, let's create an API endpoint in your Next.js project to handle form submissions:
// src/app/api/subscribe/route.ts
import { NextResponse } from 'next/server';

export async function POST(request: Request) {
  try {
    const { email, firstName } = await request.json();

    if (!email) {
      return NextResponse.json(
        { error: 'Email is required' },
        { status: 400 }
      );
    }

    // Prepare data for ConvertKit
    const FORM_ID = process.env.CONVERTKIT_FORM_ID;
    const API_KEY = process.env.CONVERTKIT_API_KEY;
    const TAG_ID = process.env.CONVERTKIT_TAG_ID;

    const data = {
      email,
      first_name: firstName,
      api_key: API_KEY,
      tags: [TAG_ID]
    };

    // Submit to ConvertKit Form
    const response = await fetch(
      `https://api.convertkit.com/v3/forms/${FORM_ID}/subscribe`,
      {
        method: 'POST',
        headers: {
          'Content-Type': 'application/json',
        },
        body: JSON.stringify(data),
      }
    );

    const responseData = await response.json();

    if (!response.ok) {
      return NextResponse.json(
        { error: responseData.message || 'Error subscribing to newsletter' },
        { status: response.status }
      );
    }

    return NextResponse.json(
      { success: true, message: 'Successfully subscribed to the newsletter!' },
      { status: 201 }
    );
  } catch (error) {
    console.error('Subscription error:', error);
    return NextResponse.json(
      { error: 'Internal server error' },
      { status: 500 }
    );
  }
}
Step 7: Create a Subscription Form Component
Next, let's create a React component for the subscription form:
// src/components/NewsletterForm.tsx
'use client';

import { useState } from 'react';
import { Button } from '@/components/ui/button';
import { Input } from '@/components/ui/input';
import { toast } from 'sonner';

export default function NewsletterForm() {
  const [email, setEmail] = useState('');
  const [firstName, setFirstName] = useState('');
  const [isLoading, setIsLoading] = useState(false);

  const handleSubmit = async (e: React.FormEvent) => {
    e.preventDefault();
    setIsLoading(true);

    try {
      const response = await fetch('/api/subscribe', {
        method: 'POST',
        headers: {
          'Content-Type': 'application/json',
        },
        body: JSON.stringify({ email, firstName }),
      });

      const data = await response.json();

      if (!response.ok) {
        throw new Error(data.error || 'Something went wrong');
      }

      toast.success('Successfully subscribed to the newsletter!');
      setEmail('');
      setFirstName('');
    } catch (error) {
      console.error('Error:', error);
      toast.error(error instanceof Error ? error.message : 'Failed to subscribe');
    } finally {
      setIsLoading(false);
    }
  };

  return (
    <div className="p-6 bg-cardBackground border border-borderColor rounded-lg">
      <h3 className="text-xl font-semibold mb-2">Subscribe to my newsletter</h3>
      <p className="text-textPrimary/70 mb-4">
        Get the latest posts and updates delivered directly to your inbox.
      </p>

      <form onSubmit={handleSubmit} className="space-y-4">
        <div>
          <Input
            type="text"
            placeholder="First Name (optional)"
            value={firstName}
            onChange={(e) => setFirstName(e.target.value)}
            className="w-full"
          />
        </div>
        <div>
          <Input
            type="email"
            placeholder="Your email address"
            value={email}
            onChange={(e) => setEmail(e.target.value)}
            required
            className="w-full"
          />
        </div>
        <Button
          type="submit"
          className="w-full bg-buttons text-textSecondary"
          disabled={isLoading}
        >
          {isLoading ? 'Subscribing...' : 'Subscribe'}
        </Button>
      </form>
    </div>
  );
}
Step 8: Add the Form to Your Blog
Now you can add the subscription form to your blog. You might want to add it to your blog's sidebar, at the end of each post, or on a dedicated newsletter page.
Here's an example of how to add it to your blog post template:
// src/app/posts/[slug]/page.tsx
// Add this to your imports
import NewsletterForm from '@/components/NewsletterForm';

// Add this after your post content
<div className="mt-16">
  <NewsletterForm />
</div>
Step 9: Test Your Integration
To make sure everything is working correctly:
- Start your development server with
npm run dev - Navigate to a blog post or wherever you've placed the form
- Fill out the form with a test email address
- Submit the form
- Check your ConvertKit account to see if the subscriber was added
Adding Images to Your Markdown Blog Posts
As you've noticed, I've included image references in this blog post. To properly display images in your markdown blog posts, follow these steps:
Store your images: Place your images in the
public/imagesdirectory of your Next.js project.Reference images in markdown: Use the standard markdown image syntax:
Update your markdown processing: Make sure your markdown processor is configured to handle images correctly. If you're using the
markedlibrary (as in your current setup), it should handle images automatically.Style the images: You might want to add some CSS to style your images properly:
.prose img {
  max-width: 100%;
  height: auto;
  border-radius: 0.5rem;
  margin: 1.5rem 0;
}
Conclusion
Setting up ConvertKit with your Next.js blog is a straightforward process that can significantly help you grow your audience. By collecting email subscribers, you create a direct channel to communicate with your readers that isn't dependent on social media algorithms or search engine rankings.
Remember to respect your subscribers' privacy and only send them content that provides value. Building an email list is a long-term investment in your blog's growth, so be patient and consistent.
Happy blogging and subscriber collecting!